
** This post is written and edited by a human being **
Phalaenopsis orchids are beautiful plants that are relatively easy to care for. Thanks to modern-day technology they can be mass-produced, which has made them widely available and affordable.
It’s often already that very first Phalaenopsis orchid that makes us obsessed with these magical plants! One orchid quickly turns into two, and before we even realize it there are several in the house!
These orchids make truly striking collections. If you’re planning to build one, or want to redo your current collection, here are some helpful tips to consider.
So here are 9 tips for building an orchid collection:
1. What to collect
2. Where to buy from
3. Check- Repot -Quarantine
4. Label-Keep track
5. Placement in house
6. How to display
7. Provide extra lights
8. Fertilize
9. Monitor humidity

1. WHAT TO COLLECT
There are many different genera of orchids out there, but the most popular genus as a houseplant is the Phalaenopsis orchid. This is also the type of orchid we always discuss here on this blog.
The Phalaenopsis orchid comes in many different colors and patterns. But perhaps the most popular choice is the one with the classic white flowers – and especially BIG white flowers.
But there are so many other colors too; dark purple, soft pink, bright yellow, you name it! And in addition to solid colors, there are many with patterns too; you can find petals with fine freckles, big dots, stripes. There are even some that look like watercolor splashes!
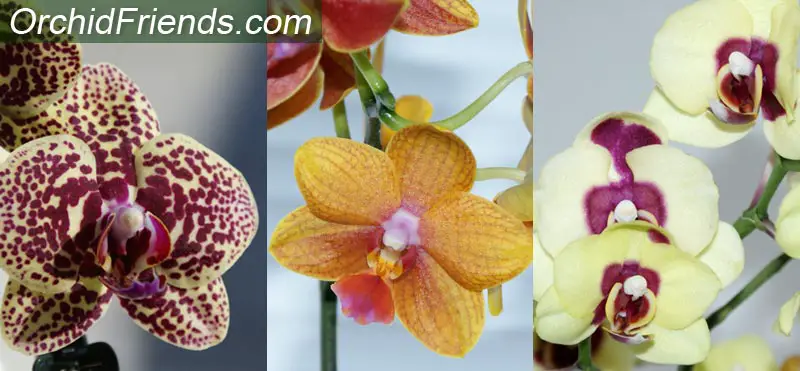
In addition to colors and patterns, there are also different sized flowers – extra large, medium and small. And even different shaped-petals!
Do you want to collect a specific look? This is something to consider before starting a collection. Only Phalaenopsis orchids with white flowers? Or different shades of pinks and purples? Perhaps you would like to have a yellow and orange collection? Or maybe a collection of as many different colors as possible?
Think about the outcome! Have a vision. What suits your taste! (And maybe even the room you have your orchids in.) A carefully thought-out collection pays off in the end, and helps you to know what to keep an eye out for! Of course spontaneous “rainbow” collections are beautiful too.
For more inspiration about different colors and types of Phalaenopsis orchids, go on Google ‘image’ search, type in “Phalaenopsis orchid” and see what’s out there!
2. WHERE TO BUY FROM
You can buy Phalaenopsis orchids in many different places. Most garden centers and even grocery stores carry them these days. There is difference in price, depending where you buy them from, but also in quality and selection.
Grocery store orchids are normally the most affordable ones out there. They also carry many different colors and patterns. The quality of the orchids from grocery stores varies; you can find very strong and healthy plants from some chains, while others carry more unimpressive, weak and even sick orchids.
I have purchased many orchids from grocery stores, and even some of my all-time favorites are from there! I quickly learned which of my local grocery stores carry ‘better’ orchids. For example, orchids from one chain kept having hidden stem rot or even pest issues, time and again.. So I’d quickly start to avoid buying orchids from those places.

And with other chains I had great luck – strong healthy orchids, with no stem rot, bad roots or pests. So I knew to favor those shops instead. They were obviously getting their orchids from better orchid nurseries.
Your other option to buy orchids from is garden centers. In my experience you can find very unique types in these places, and the quality (health) of the plants is often more consistent. The prices tend to be higher, though.
The only thing I’d advise you to do in a garden center (and of course this applies to grocery stores too), is to walk around and inspect the other plants they have for sale; see if you find any visible pests walking on any other plants.
Once a pest infestation hits a garden center, it can quickly spread all over the shop. Some garden centers are very big with a lot of plants, so a pest infestation can be impossible to tackle there.
So for me it’s always a red flag if I see e.g. mealybugs on any other plants – then I don’t want any orchids from there either! Even though of course it doesn’t mean the orchids have them too with 100% certainty, but for me it’s still not a risk worth taking.
The third place to buy orchids from is online vendors. There are many reputable sellers, like Norman’s Orchids. (Not affiliated)
The quality of these plants from reputable online vendors is normally high. And the plants are safe when it comes to pests and diseases. Most of the time, they also offer a refund if you are not completely satisfied with the order. Furthermore, they sell orchids with ID tags, so you know exactly what type of Phalaenopsis orchid you are getting.
*There are many hybrids without an ID (identification) in the market – which of course is not a deal breaker for most people, myself included, but some prefer orchids with an ID.
Overall, consider your options where to buy your orchids from, and stick with sellers that provide healthy orchids. Your collection will thank you for it!
3. CHECK- REPOT -QUARANTINE (all new purchases)
This is an important step with building your collection! Even though it’s tempting to put the brand new orchid immediately with the other ones, trust me, and I’ve learned this the hard way, this step isn’t worth skipping!
I spent a lot of time, energy, love and dedication to build my very first orchid collection. They all brought me joy and were very special to me. I was in my first few years of discovering orchids, so I wasn’t aware of possible pest infestations. I didn’t know what to look out for, or even to think about such thing!
Then one day I started noticing strange signs on one of the orchids. Long story short; it turned out to be a false spider mite infestation, that had slowly (but surely) taken over the whole collection!
I ended up losing the whole collection in the end, which almost made me not want to buy another orchid ever again. But in hindsight, it made me wiser. I now check-repot-quarantine every new orchid I bring home. This is how I do it;
When I bring the brand new orchid home, I immediately take out my magnifying glass. (I have one that is connected to the computer, so I can see the view on big screen. But any magnifying glass will do)
I inspect the leaves, crown, stem, even flowers… Try to check as many places as possible. Look at the potting medium; on top, but also move some bark pieces away to see if anything is moving down there.
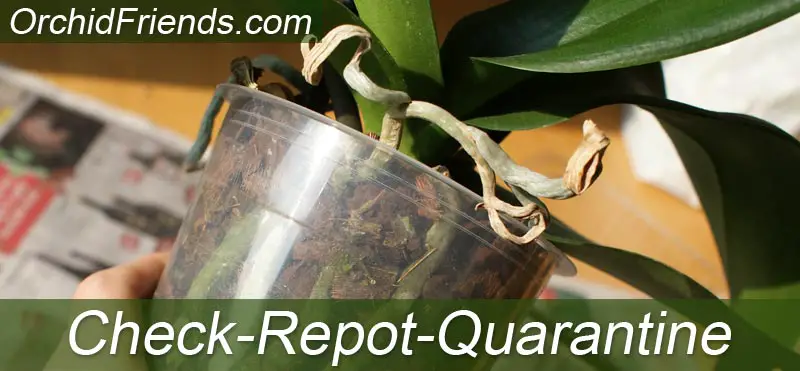
Obviously there shouldn’t be any live bugs on the orchid. But webbing is something to look out for too, because some pests like false spider mites make webbing. Real spiders are safe though!
If the orchid gets an all-clear, I then repot it immediately. Yes, repotting while in bloom can sometimes make you lose some flowers, but I prefer to see the condition of the stem and the root system immediately, in case there are problems.
Once I’ve repotted the plant I still leave it in quarantine for a while. Just out of reach of the collection! If you can leave it in another room, great. But if you live in a studio apartment, then just keep it as far away from your collection as possible.
The quarantine can last from a few weeks, up to a month or two. It’s just to make sure nothing will appear on the orchid! And with ‘nothing’ I mean hidden pests I couldn’t detect with the magnifying glass or even their eggs that hatched during the quarantine.
What to do if there are pests in the new orchid? There are a few options;
- Return the orchid to the seller
- Treat the pest issue (in quarantine)
- Dispose of the affected orchid
Ultimately it’s up to you. Not everyone wants to take on the battle of fighting pests, which is understandable.

4. LABEL & KEEP TRACK
When you first start your collection it’s pretty easy to keep track of your plants. When was the last time you gave them fertilizer, when did you water them, when did X and Z bloom the last time…
But as your orchid collection grows it becomes harder and harder to keep track of your plants! So I found it useful to keep an orchid journal. I write down the dates when I fertilize, when I water (if it happens on different times), when new flower spikes or keikis start to grow, if an orchid had a rotten stem etc.
It just makes keeping track of things easier and especially during busier times in life! Plus, personally, I don’t have a good sense of time as it is – a few weeks can feel like a month to me, so having black on white helps!
On top of keeping a journal, it’s also helpful to label your orchids. After the bloom, when all there is are green leaves, the plants can suddenly start to look similar to each other. And once they’re growing new leaves, the shape of the orchids quickly start to change!
On a few occasions, I’ve forgotten which orchid was which, so I had to wait until the next bloom to find out! (As we all know, it sometimes takes a long time before the next bloom)
So putting simple labels on your orchids to identify them can truly come in handy! And this, of course, applies as your orchid collection starts to grow bigger!
5. PLACEMENT IN HOUSE
The right placement for your collection is the key in keeping your orchids happy and thriving. Make sure the orchids get enough daylight, without being able to burn in the sun during hot seasons. South and East facing windows are normally the best when it comes to enough daylight.
With a whole collection, instead of just a few orchids, you also need to think about the overall space. Find a place/wall where you can fit a good amount of plants (depending on how big of a collection you want to build – though of course, you can always expand later).
Make sure the spot you choose is safe from drastic drafts – and especially if you live on a climate with cooler seasons. Extreme temperature changes, cold or hot, are not good for Phalaenopsis orchids.
6. HOW TO DISPLAY
Once you have found the perfect place to build your orchid collection, it’s time to decide how you want to display the collection.
A simple table, shelves attached to the wall, a standing shelf with several levels, a ready multi-level plant stand – there are many options to choose from! Think about the bigger picture.
Find something that fits your aesthetic and style, something that goes with the rest of the room. Aim to display the orchids nicely, yet making sure enough light can still access the orchids. Also keep in mind that you need to water the orchids, so keep the setup accessible.
If your orchid collection is by the wall, you can also think about the background. With this, I mean the color of the wall! Pick a paint color for behind the collection, that makes the plants and blooms pop up against it!
If you’ve noticed in many high-quality orchid photos, even in orchid shows, the photographers use darker colors for the background (black, dark blue) to emphasize the plant/flowers. This works in real life too.
Of course, not everyone wants a dark wall! But you can get creative with it. You can even use a fabric of some kind for the background – or just the white wall. It’s up to you; the only limit is your imagination!
7. PROVIDE EXTRA LIGHTS
Additional lights can provide a good extra boost to your orchid collection. Good lighting affects the plants’ growth and blooms. Depending on where you live, the natural light source isn’t always enough for indoor orchids – and especially during Autumn and Winter seasons! During summer and spring, however, additional lights aren’t usually necessary.
There are different types of artificial lighting in the market. You can buy ready plant growth lamps, but also full-spectrum lights made for reptiles work the same. Even normal LED light bulbs are enough!
When you place the lights for the plants, remember the leaves and flowers will start to grow towards them. This is because leaves and spikes always grow towards the strongest light source. So perhaps you want the lights to be placed slightly in front of the plants, or above.
Another reason to provide extra lights is the amount of blooms. Not so much how often the orchid blooms (that has nothing to do with light, only temperature), but how many flowers you get each bloom.
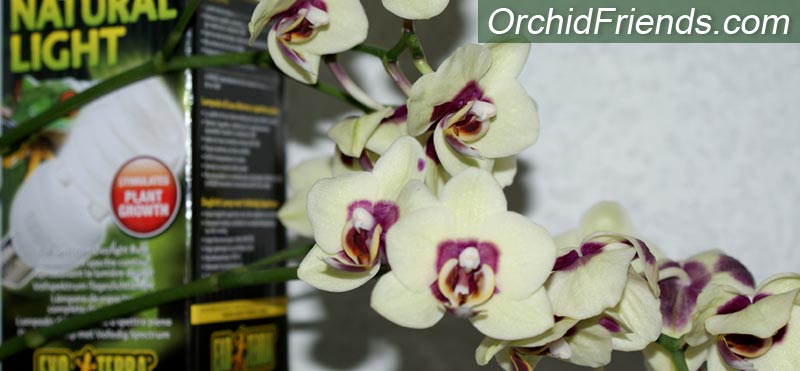
Sometimes shorter flower spikes and not so many flowers are the result of insufficient daylight. Of course it can be other factors too, like lack of energy, but you can always test if extra lights would yield more flowers in your orchids.For examples of suitable lights here.
8. FERTILIZE
Fertilizing your Phalaenopsis orchids is a must if you use rain, distilled or Reverse osmosis water. These waters are so pure they lack all the minerals. So adding fertilizer is a must.
If you’re using tap water, however, it’s not a must to add fertilizer in the water. But it can be beneficial! It can affect the overall health and strength of your collection, and even the blooms.
So if you’re after an impressive orchid collection, wanting to use every card possible to make your orchids flourish, then I’d recommend you to ‘feed’ your orchids!
There are many ready orchid fertilizers in the market. Read the product’s dosing instructions carefully! You can even cut down the recommended amount. Many orchid growers swear by “Weakly, weekly”. Or you could fertilize only during the ‘vegetative stage’, which is the time when the orchids aren’t in bloom, and are growing new leaves and roots instead.
9. MONITOR HUMIDITY
Phalaenopsis orchids grow in rain forests, so they get plenty of humidity in their natural habitat. This is why you should monitor how much humidity your orchids are getting indoors. I keep a digital hygrometer by my plants so I always know how much humidity they’re getting. It shouldn’t be below 40%.
I struggle with too dry indoor air, some days measuring only about 20% humidity. This, of course, is too dry even for us humans! So I’ve had to add water bowls and trays around the orchids, to provide them extra humidity. They thank you for it!
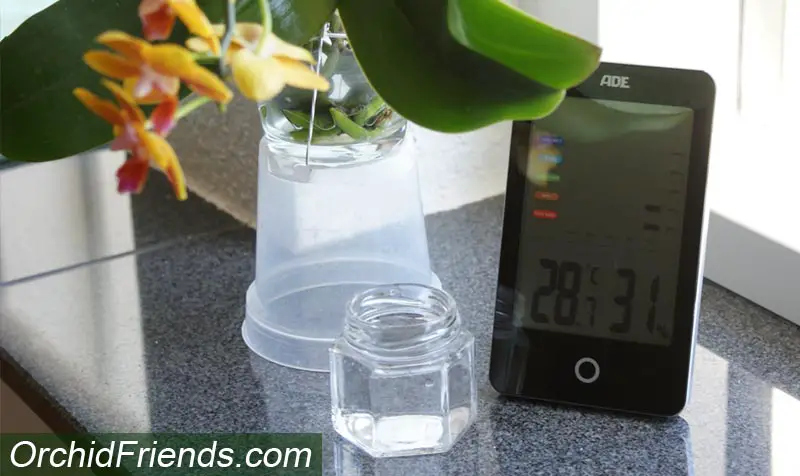
Too dry indoor air affects the quality of your plants – they just don’t thrive as well! You can maybe see some wrinkling of the leaves, even if you know you water the orchid often enough. So to make your orchid collection thrive, make sure the humidity stays high enough!
You can buy ready air humidifiers for your orchids. Or just put some small bowls with water around them. If you have one orchid that seems to really struggle with dehydration, you can put it to stand on a humidity tray. Humidity tray is just a tray, with some rocks or clay pebbles on it; pour some water on it, and put the orchid to stand on it in its pot. Add water as necessary.
Maintaining the suitable humidity levels will truly show in your orchid collection!
FINAL WORDS
I hope this article has given you something to think about when planning your orchid collection! Make it an exciting project, and remember to enjoy every step of it! The outcome will be worth it all, and you’ll have fun while getting there.
I’d love to hear how your collection building goes, so please leave a comment below – I’ll be reading them!
Thanks for stopping by. Have a beautiful day, orchid friends! 🌸



Through these articles, I have learned to look at different way of orchids: they are no longer “beautiful but soulless”! Great – thank you!
That’s really nice to hear!
Thank you Anna-Marja!