** This post is written and edited by a human being **
Phalaenopsis orchids are tropical plants, growing in the jungle attached to tree trunks and branches. Their aerial roots collect humidity from the air, which is crucial for their survival.
In the rainforest, the normal air humidity is between 77 and 88%. This high numbers are naturally hard to mimic under indoor conditions!
For your house orchid to thrive, the air humidity should always remain above 40% – minimum. This is a struggle for some people, whose indoor air is constantly too dry. On top of that, air humidity tends to drop by 10% during the winter season.
Luckily there are different ways to keep the humidity levels up – humidity trays being one of them! Let’s explore them in more detail below.
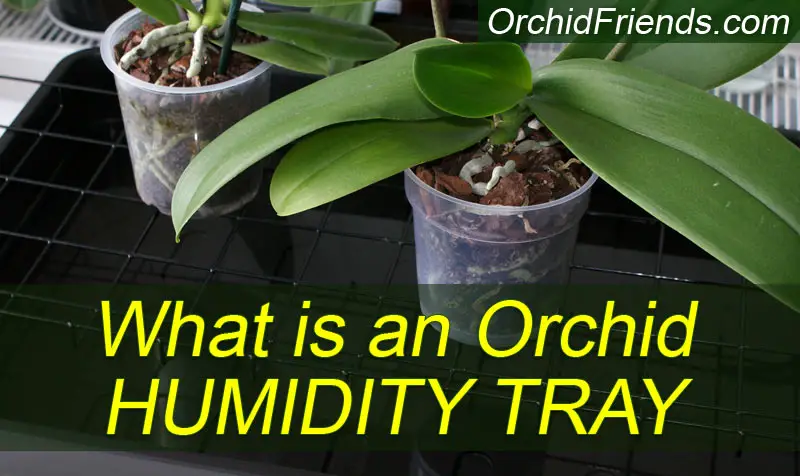
So what are humidity trays for orchids? The humidity tray is a setup of a tray, with a plastic grid or a layer of gravel/stones in it, and water. An orchid is placed to stand on it in its pot. The evaporating water from the tray provides added humidity to the orchid.
The easiest option is probably to buy a ready humidity tray. They come in different sizes, providing space for one (1) or several orchids to stand on. They’re usually black and made of heavy-duty plastic.
Some of these ready humidity trays have a plastic grid lid, which makes it convenient to place an orchid to stand on it. No need to add anything else in the tray itself, except for water. You can keep an eye on the water level through the grid, adding more water when necessary.
I have to say I like the look of these ready humidity trays, specifically for the grid on top of it! They look stylish and neat and are really handy. The prices vary, but normally start from $20-30 and up.
Ready humidity trays can be bought online. You can also check your local garden shops and Target etc.

How to create a humidity tray for orchids
If you don’t want to buy a ready humidity tray, I have good news for you. You can make your own! I have several DIY ideas for you, which will hopefully give you enough options to work with!
So the basic idea of an orchid humidity tray is to have a container of some kind. It doesn’t have to be too deep, just deep enough to hold some water in it. (We want the vapor, not the water!)
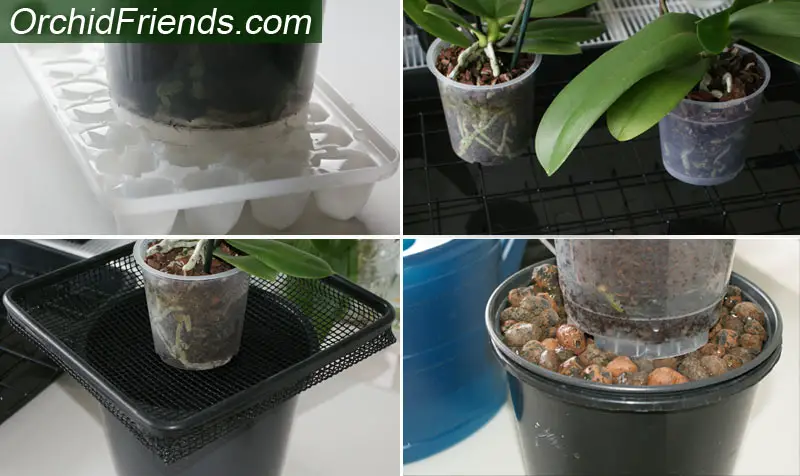
Boot trays with grooves in them, ice-cube trays, old bakeware, any kind of tray/container that can hold some water in it.
We don’t want the orchid pot to stand in the water itself – that’s why it needs to be lifted up from the water with something. If you use a boot tray with grooves in it, or an ice-cube tray, then you don’t need anything extra to keep the orchid from touching the water.
But, if you’re using a container with a smooth bottom, then something needs to be added in it. This ‘something’ can be pea gravel, decorative stones, pre-washed Leca pebbles, or even marbles!
Your aim is to put a layer of something steady at the bottom of the container, so the orchid stands on it instead of directly in the water. A constant contact with water would lead to root rot! You only want the vapor from the water – not the water itself.
You can also put a sturdy net or a plastic grid on top of the container – anything you can find! (Strong enough to hold the weight of the plant) Even plastic egg-crates work perfectly!
If you don’t want to keep your orchids standing on humidity trays, you can place water containers of any kind around the plants. Glass jars, drinking glasses, plastic bowls, anything will do! Just fill them up with water.
They should be placed as close to the orchids as possible. If one of your orchids is struggling with dehydration, then place the containers directly next to it. As many as needed!
The closer to the orchids they are, the better! If you place them too far away from the plants, you are not increasing the humidity levels around the orchids, but only further away from them. This is of no benefit to the plants.
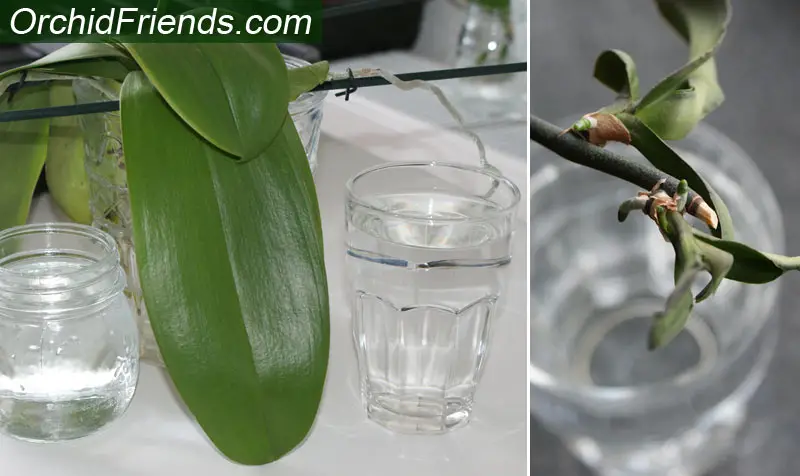
Added humidity trays work wonders also for orchid keikis, if you want to encourage them to start to grow roots! Just put a glass of water below the keiki, and add water as needed.
Before we move on I’d like to remind you to keep an eye on the humidity trays. Standing water can start to produce ‘slime’, so rinse the tray and even the rocks every now and then. Maybe even sprinkle a few tiny charcoal pieces in it to pull in toxins?
Humidity box for plants
Humidity box is something I’ve found extremely helpful and handy on several occasions. It’s basically a clear plastic box with a lid on. You put the orchid in need of extra humidity inside of it.
Once the lid is closed, humidity starts to form inside the box. This is a great method when treating severely dehydrated or even rootless orchids. Just make sure to keep the box out of the sun because if the sun hits the box, the temperature inside of it will quickly rise too high. Phalaenopsis orchids don’t like heat!

Also, the lack of air circulation inside the box can lead to too much humidity. This, in turn, can lead to white mold. So keep an eye on the box, and open the lid now and then to get some fresh air inside the box.
If you’re feeling mighty creative, you could place a miniature fan inside the box, which would keep the air moving around the plants. I’ve never tried this myself, but I know they can work great. (If you do try it, please let me know!)
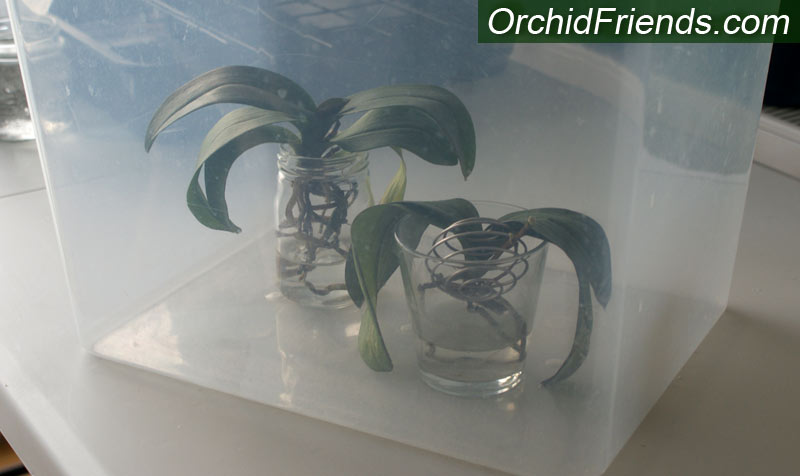
The clear plastic storage boxes make great humidity boxes because they’re ready to go! You don’t need to do anything to them, and the lid makes them super handy!
But of course, any kind of see-through container works. Even an old aquarium or terrarium! Just cover it with cling film, and puncture some air holes in it with a sharp needle.
Orchid humidifier
Evaporative humidifiers work great for indoor orchids. The inbuilt fan pulls air into the machine and blows it out through a filter, making the air humid. These filters need to be changed from time to time.
Prices for evaporative humidifiers start from around $40. They’re pretty easy to find, whether you buy one online or locally. The only thing I’d ask you to keep in mind is the changing of the filters. If that’s off-putting to you, then consider other options.
For filter-free electronic humidifiers, you could look into Ultrasonic humidifiers instead. They’re slightly more expensive than Evaporative humidifiers, but you save money over time by not having to buy new filters.
Ultrasonic humidifiers produce humidity through high-frequency sound vibration. It comes out as a fine mist, which is perfect for orchids. With automatic humidifiers like this, it’s the combination of humidity and air-circulation that makes them so efficient.
The only thing to keep in mind is the noise these machines can produce – some of them can be rather noisy! But of course, you don’t have to have them running from morning to night! You could switch your humidifier on only, e.g., twice a day for 15 minutes per round. (Depending on your air humidity)
The plastic bag method for orchids
For a Phalaenopsis orchid that’s struggling and in need of extra humidity, you could also try the plastic bag method. This is very easy and inexpensive to do, and provides quick high levels of humidity.
Take a see-through plastic bag, and put it over the orchid in need. Seal the bottom slightly so humidity will start to create inside the bag. Or, take the orchid and put it to stand inside the bag as it is. Close the opening of the bag with a twist tie or string.
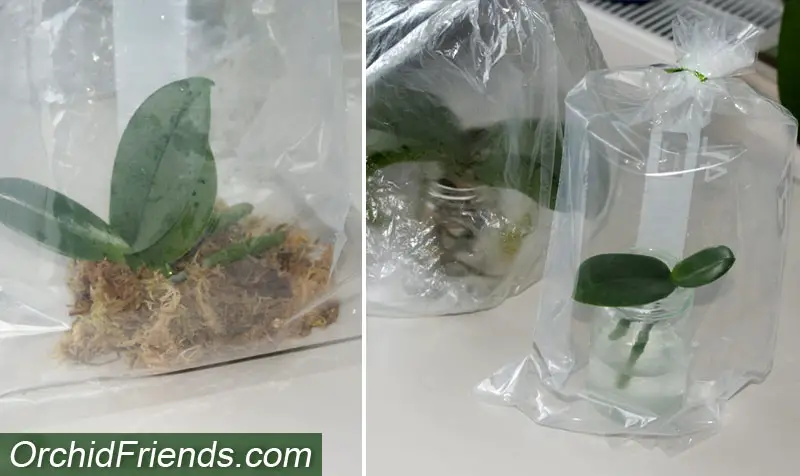
Another way to do the plastic bag method is by first soaking some sphagnum moss. Then put some of it inside a clear plastic bag. (Ziploc bags are handy, but any will do!) Then put the orchid inside the bag on the moss, and close the bag.
Keep an eye on humidity levels – if the bag starts to look too moist, or if white mold appears, then open the bag for some fresh air daily.
This plastic bag method is great for orchids that are struggling and in need of quick high-levels of humidity! The idea is the same as with the clear plastic box method (mentioned above), but if you don’t have a suitable box, then you can surely always find some plastic bags in the house!
FINAL WORDS
I hope this article has answered some of your questions about humidity trays for orchids. And hopefully given you some ideas about what YOU want to do!
I have found humidity trays and containers to be very helpful, as I am experiencing constant too dry indoor air in my home. They do raise the humidity levels when placed close enough to the orchids!
If you have some ideas about humidity-creating setups that didn’t get mentioned in this article, then please leave a comment below! I’d love to hear your ideas and experiences.
On that note, I thank you for reading, Orchid Friends! Till next time, take good care! 🌼


Now I know what I’ll use old ice-cube trays for!
So much learning again – thank you!
Such good info! I am trying to revive a phal that lost all it’s ‘underground’ roots hoping the aerial roots will draw up enough moisture. In your photo above where you’re using the clear storage box, the jar and glass that are used for the orchids appear to have their roots in water. Should I put my lower aerial roots in water? Thanks for any help you can provide!
Hello Grace
Yes, you can put the aerial roots in water – all or just some of them. It will help max the water intake.
Optionally (or additionally), you can mist the roots daily. (Always avoid getting any water in the crown though!)
The humidity box works great, but so do the humidity trays for extra humidity! Keep an eye on your orchid’s leaves; if they start to get wrinkly, then it’s not receiving enough moisture.
Hope this helped. Good luck! 😊